
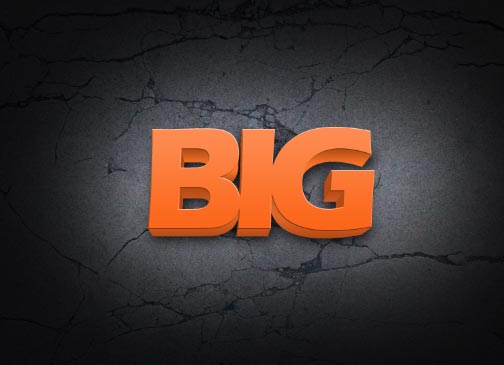
In this tutorial, we will go through the process of creating large 3D type grunge titles. Plain titles in booklets, catalogs and magazines just do not work anymore in getting that buzz and interest. What you need usually nowadays is some interesting cover or design gimmick that gets your posters and postcards picked up. That is why it is well worth it to try out some other specialized design techniques for your titles, just like the effect we have here. So just read through the steps below and learn how to create large 3D grunge type text effects.
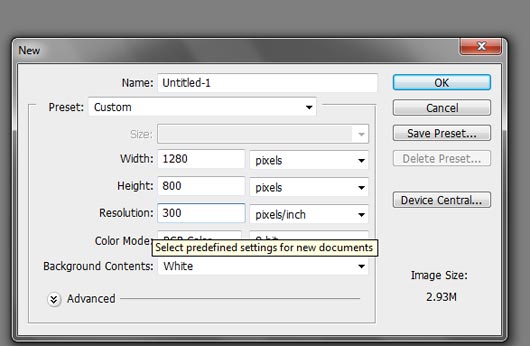
Step #1. First setup your document. You do not have to set it to the dimensions of your printed document for now as you can insert the work as a picture later. However, it would be a good idea to have a fairly large document (because we are creating large 3D text). Also for printing, using a 300ppi resolution is recommended for the best printing results.
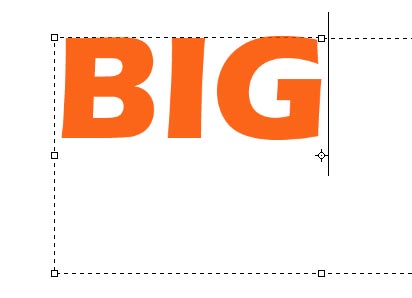
Step #2. Now, with your new document open, type in the title that you want. For this effect, it is better for you to use Sans Serif type fonts that are heavy or thick. Use a color of course that matches your theme as well.
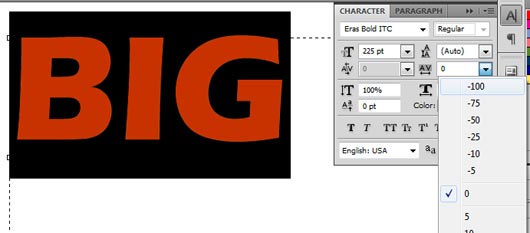
Step #3. Next, adjust the character spacing of the text. We will want them to be closer together, actually touching each other to make our effect look better. To do this, simply select your text and then go to the character panel. Set the character tracking for your text to a negative value, until their edges make contact.
Step #4. Next, duplicate the text using the keyboard shortcut CTRL+J. Change the color of our duplicate text to a darker shade than the original. Also reduce its size a bit by pressing CTRL+T (transform) and just scale it back a little as it will be at the back and a little bit further away from you. Of course, adjust the layer order so this is at the back.
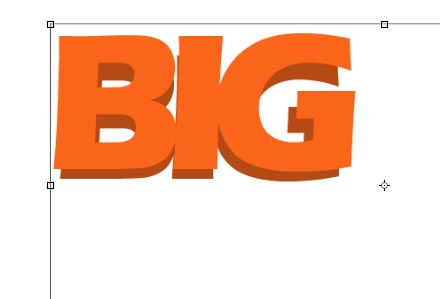
Step #5. Next, create a new layer by pressing CTRL+SHIFT+N. Place this new layer on top of the darker duplicate text layer we created, but behind the original one. Use the Polygonal Lasso tool to connect the points of the front text to the ones at the back. This gives us our 3D effect.

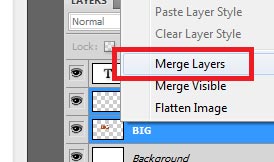
Step #6. Afterwards, merge the bottom text and the new layer we just created into one. Simply select the text layer first and right click on it to bring up the context menu. Choose "rasterize type..." Afterwards, select the rasterized text and our other layer text and then right click on it to bring up their menu. Choose "Merge Layers" to merge these two layers as one.
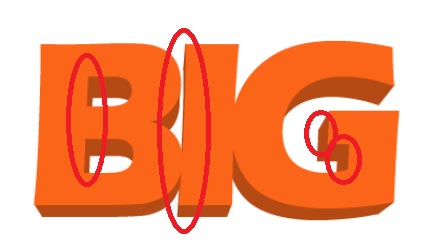
Step #7. Now, if you look at our text carefully, most of the "extruded" elements that make up the 3D effect comprise the bottom areas of our text. Only five parts represent the sides of the text, inner right side of the "B", the left side of the "I" and the two parts in the G.
Step #8. These are the areas that we will want to preserve before we change the color of the extruded areas to a gradient. Create a new layer and then with the use of the polygonal lasso tool, select and copy these edges. Use the original color when filling these out. We just used yellow in the example to make you see better.

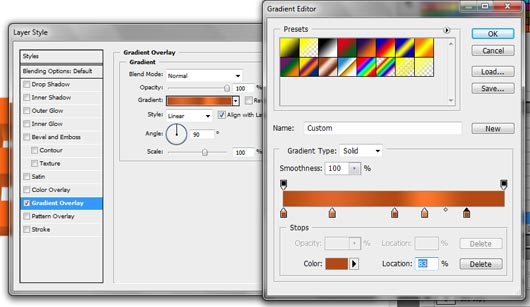
Step #9. Great! Now, with that done, we add some gradient colors for the bottom layer that we merged earlier. This will simulate extra shadows. Simply select the bottom merged layer and then double click on it to get to its blending options. Add a gradient overlay and use these values.
Blend Mode: Normal
Opacity: 100%
Style: Linear
Gradient Color: 6 color gradient
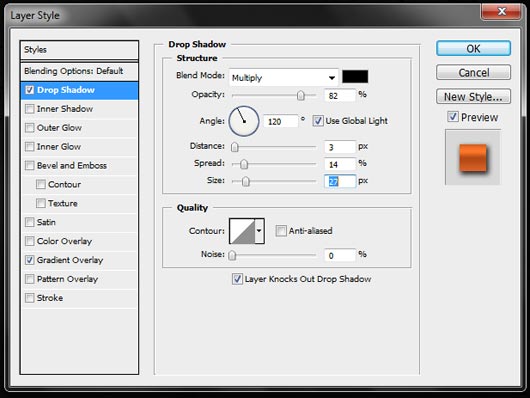
Step #10. Also, add in a drop shadow. Just click on the drop shadow option, and the add these settings below.
Blend Mode: Multiply
Opacity: 82
Angle: 120
Distance: 3
Spread:14
Size 27
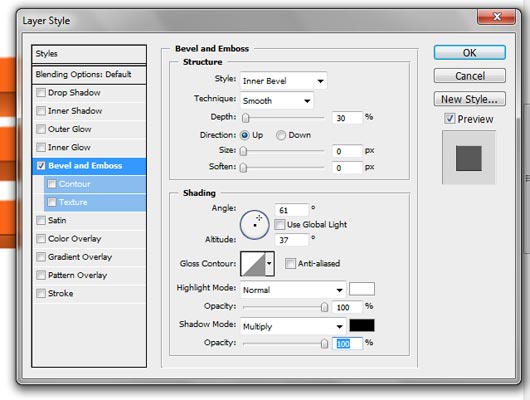
Step #11. Now, we will emboss the upper part of our text. Select the top text layer earlier and then double click on it to bring up its blending options. Click on the Bevel and Emboss option and then plug in these settings:
Depth: 30%
Size: 0
Soften: 0
Angle: 61 degrees
Altitude: 37 degrees
Highlight: Normal, White, 100%
Shadow: Multiply, Black, 100%
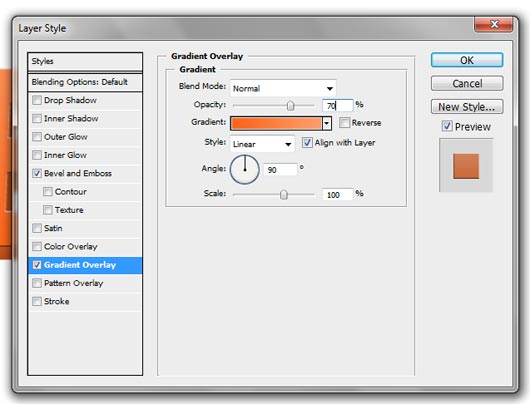
Step #12. Then, add a gradient overlay to this layer by checking its appropriate checkbox. Apply these values:
Blend Mode: Normal
Opacity: 70
Gradient Color: Orange to Light Orange
Style: Linear
Angle: 90
Step #13. Great! Now, we'll add a grunge background to accent our 3D text. Just paste in the background that you want as the bottom layer.
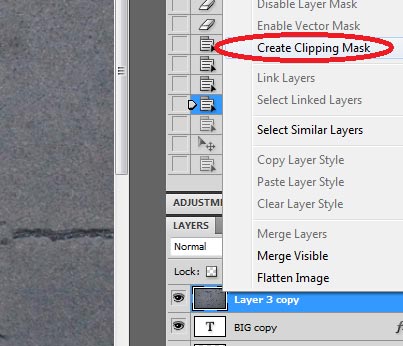
Step #14. Then, let us add a texture for our text as well. Paste in a grunge image texture on top of your top text layer. Position this texture so that it is slightly bigger than the text. Then right click on it and select "create clipping mask".
Step #15. Afterwards, you should now have a nice and Large 3D type Grunge text for your Title. Congratulations!
